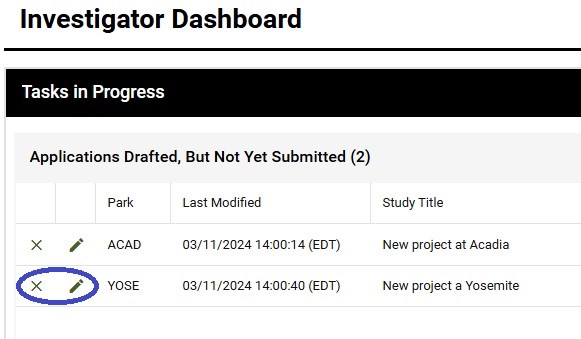
To do research in a park, you must first apply for and obtain a permit from the park. The research coordinator at the park will review your application. If they intend to approve it, they will create a permit with specific conditions and other details that they have added or edited (e.g. start and end dates, where and for how long you may place field equipment, how many specimens you may collect). They may correspond with you during the review process. Both your application and any resulting permit will permanently stay in your Investigator Dashboard.
How to Do This

When starting a new application, you will first see a message about information that is required or optional in your application. You may want to develop some of this information (for example, a detailed study proposal, which is required for any new permit application) before beginning to fill out the form. To get into the form click the “Continue Application Process” button at the bottom of the message page.
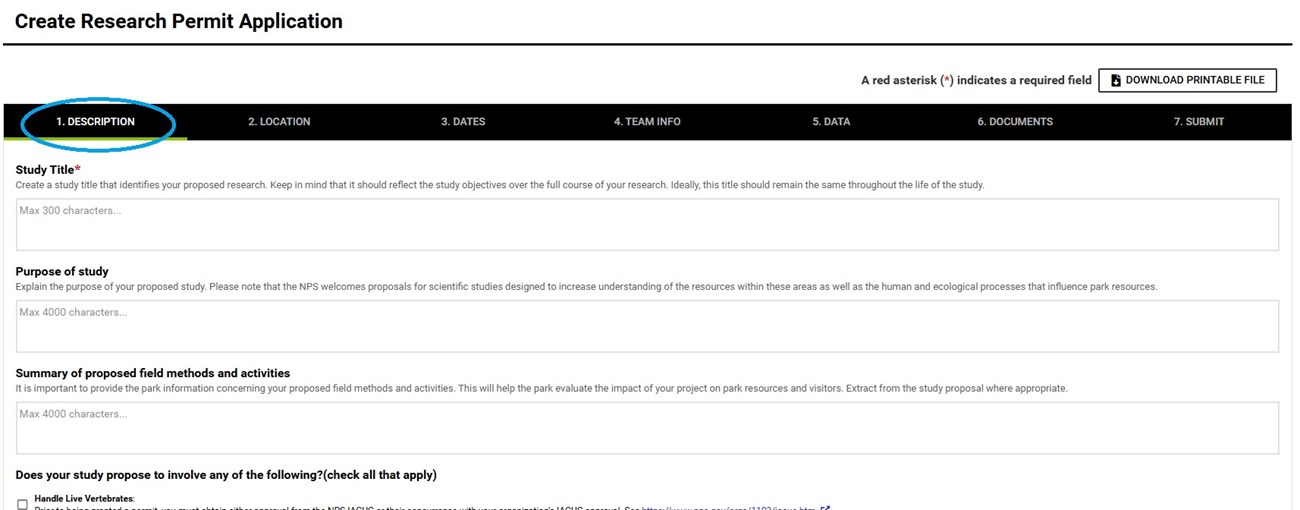
The application form consists of six numbered tabs (Description, Location, Dates, Team Info, Data, Documents) and a seventh tab to submit. See the image below. Each tab contains fields like text boxes, check boxes, and radio buttons. Fields with asterisks are required. Some fields use conditional formatting so that additional sub-fields appear depending on what options you select.
The application form consists of six numbered tabs (Description, Location, Dates, Team Info, Data, Documents) and a seventh tab to submit. See the image below. Each tab contains fields like text boxes, check boxes, and radio buttons. Fields with asterisks are required. Some fields use conditional formatting so that additional sub-fields appear depending on what options you select.

Tab 1. Description
- Note the character limits for the text boxes.
- Proposals that involve any of the check-box activities (Handle Live Vertebrates, Unmanned Aircraft, etc.) may require additional permits or approvals that you must secure in advance. Review the associated guidance and links provided on this tab.
- Use the drop-down list to identify the park unit where you will conduct your study. If you intend to do the same study in multiple parks, you must submit a separate application to each park. This is easy to do, as explained in “Apply to Multiple Parks.”
- Enter your expected dates.
- Parks often issue permits for only one year. If you expect to continue the study the following year, it is easy to renew. The one-year duration of permits with renewal allows both parks and investigators to better adjust their plans in the face of inevitable change. It also helps ensure investigators submit required annual reports. A research coordinator may choose to make permit renewal contingent on receipt of the previous year's report.
- A permit is issued only to an investigator – never to an institution, team, lab group, etc. – and that person will be listed on the permit as the sole principal investigator.
- Other people who will be engaged in study activities in the park should be listed on the permit as additional investigators. This is essential so the park’s law enforcement rangers know whether people they encounter in the field are engaged in authorized activities. To add project personnel, click the “Add Co-Investigator” button on the tab.

- In the box at the top, provide a description of where data and other information products (field notes, maps, etc.) will be stored. If you have already created a data managment plan for your project, you can copy an excerpt into the box.
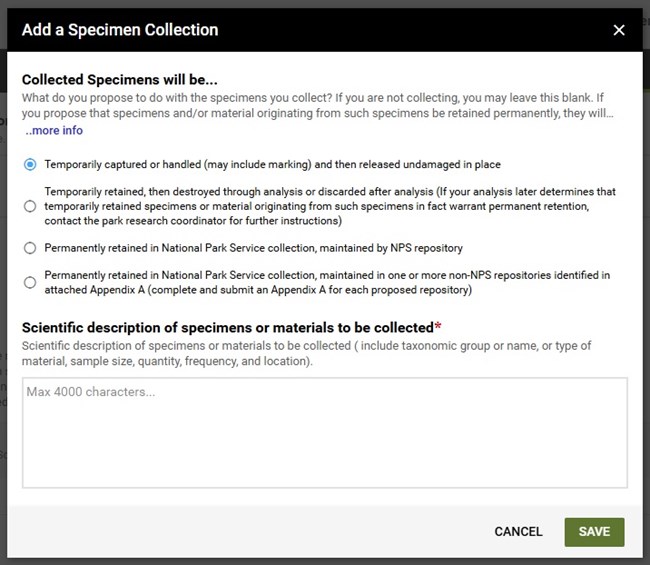
- If you answer "Yes" to the question about handling or collecting specimens, you must click the "Add Specimen Collection" button. Once you do, a pop-up window appears. See the image to the right. That window includes a box where you must describe the collection. There are also radio buttons which you must use to indicate your plan for the specimens.
- Under Federal law, specimens you collect remain federal property under the authority of the NPS. When issuing a permit, the NPS may authorize you to collect and release specimens in situ, destroy them during analysis or discard them after analysis, or retain them in an NPS collection at an NPS repository or a non-NPS repository.

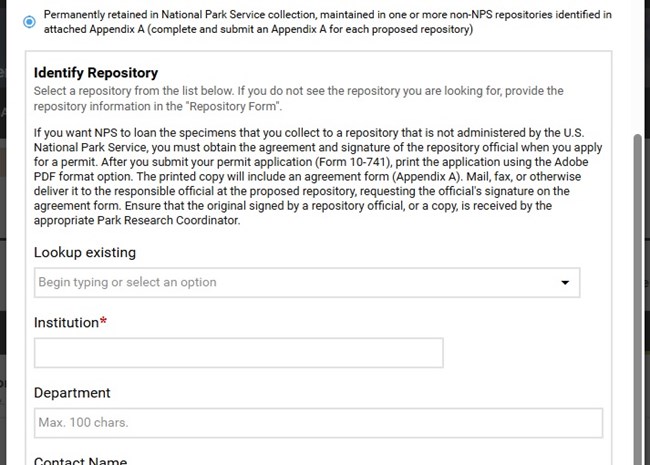
- If you use the fourth radio button to propose that specimens be retained in NPS collections and placed on loan to a non-NPS repository (like a museum or university herbarium), the pop-up box will expand and prompt you for the name of the repository that you recommend. See the image to the right.
- If the repository is not in the drop-down list of existing repositories, enter the name and contact information in the fields.
- It is your responsibility to obtain the repository’s agreement to store the specimens with NPS accession numbers and related curatorial records. Such agreement is recorded in Appendix A of the application and signed by the repository official. Appendix A will be created at the end of your permit application process; you will need to send it to the repository official for signature and then send the signed document to the park research coordinator. For details on this required step, see Obtain an Appendix A Signature.
- Because specimens are federal property managed by the National Park Service, the park has the right to decide whether to approve retention in the repository you identified.
Tab 6. Documents
- This tab enables you to upload additional files like maps, photos, etc. that can help park staff evaluate your application.
- If this is a new permit application (not a renewal of an existing permit), you must upload a detailed study proposal. See Guidelines for Study Proposals.
- On Tab 7, RPRS will test whether all required fields have been completed and will add alert symbols to indicate which tabs are missing information.
- Once the form is complete, you may submit your application or save as draft. Once the application is submitted, you will not be able to make further edits.
- The name of the park to which you applied.
- A unique application ID number.
- A couple of options to download your complete application as a pdf if you wish.
- A link to use your application as a template for applying to another park in case you are proposing a multi-park study.
- A paragraph summarizing the required next steps if you propose that NPS loan collected specimens to a non-NPS repository. See Obtain Appendix A Signature for details.
Last updated: March 24, 2025
